
Welcome to your new home sewing machine! This manual guides you through safe operation, basic features, and troubleshooting, ensuring a smooth sewing experience for all skill levels.
Welcome to Your New Home Sewing Machine
Congratulations on acquiring your new home sewing machine! Designed for household use, this machine offers versatility and ease of operation. With 32 built-in stitches, it’s perfect for various projects, from simple repairs to intricate designs. This manual will guide you through safe usage, features, and troubleshooting. Read carefully to unlock your machine’s full potential and explore endless creative possibilities. Happy sewing!
Understanding the Purpose of the Instruction Manual
This manual is your essential guide for operating and maintaining your sewing machine. It provides step-by-step instructions, safety precautions, and troubleshooting tips to ensure optimal performance. By following the guidelines, you can extend the machine’s lifespan and enhance your sewing experience. Refer to this manual regularly to maximize efficiency and creativity in all your sewing projects. Happy sewing!
Unpacking and Inventory
Carefully unpack your sewing machine and verify all components are included. Check for any damage and ensure all accessories are accounted for before initial use.
When unpacking, place the machine on a stable surface. Remove all packaging materials carefully to avoid damage. Inspect the machine for any visible scratches or dents. Ensure all accessories, like bobbins and needles, are included. If any items are missing or damaged, contact customer support immediately. This ensures your sewing experience starts smoothly and without delays. Always refer to the manual for specific unpacking instructions.
Carefully verify all items against the packing list. Ensure the sewing machine, power cord, foot pedal, bobbins, needles, and accessories are included. Check for any damage or missing parts. If discrepancies are found, contact customer support promptly. Proper inventory ensures optimal machine performance and prevents delays in your sewing projects. Always maintain these accessories for future use. Always unplug the machine when adjusting needles or performing maintenance. Keep loose clothing tied back and avoid distractions while sewing to ensure a safe experience. Always turn off and unplug the machine before making adjustments or performing maintenance. Always unplug the sewing machine when not in use or during maintenance. Always turn off the sewing machine when handling the needle area. Your new home sewing machine is designed for versatility and efficiency, offering a range of built-in stitches and user-friendly features to enhance your sewing experience. Your new home sewing machine boasts an array of advanced features, including 32 built-in stitches, automatic needle threading, and adjustable stitch length and width. It also offers a free-arm design for easier sewing of cuffs and sleeves, along with a built-in walking foot for handling thick fabrics. Additionally, the machine includes a large LCD display for easy stitch selection and a convenient start/stop button for precise control. These features make it ideal for both beginners and experienced sewists, allowing for a wide range of creative projects. Familiarize yourself with your machine’s essential components, such as the spool pins, tension dials, and bobbin area. The stitch selector and foot pedal are key for operation. Understanding these parts ensures smooth sewing and helps you maximize your machine’s potential for various projects. Proper knowledge of each component’s function is crucial for maintenance and troubleshooting, making your sewing experience more efficient and enjoyable.
Threading your sewing machine correctly is essential for smooth stitching. Follow the manual’s step-by-step guide to thread the upper and lower parts accurately, ensuring proper tension. Start by turning the machine off and locating the spool pin. Place the thread spool on the pin, ensuring it rotates smoothly. Gently pull the thread through the tension discs, then guide it through the take-up lever. Next, insert the thread into the needle’s eye, leaving a small tail. Pull the thread to remove any slack, ensuring it’s not too tight or loose. This setup ensures even stitching and prevents thread breakage during sewing. Proper tension is crucial for consistent stitch quality, so always check the thread after threading. To wind the bobbin, place it on the winder and secure the thread end. Wind evenly, keeping the thread taut but not overly tight. Once full, cut the thread and remove the bobbin. Insert the bobbin into the bobbin case, ensuring it seats properly. Pull the thread gently to engage the tension. Finally, place the bobbin case into the machine’s bobbin area and close the compartment. Proper installation ensures smooth stitching and prevents thread jams. Always use the correct thread type and keep the bobbin loosely wound for best results. To thread the lower section, start by inserting the thread into the bobbin case. Guide the thread under the tension spring and through the machine’s lower threading path. Gently pull the thread to ensure it is seated properly. Make sure the thread is not twisted and lies flat. Proper lower threading ensures consistent stitches and prevents thread jams. Always use the correct thread type for your fabric. If issues arise, consult your manual for troubleshooting tips. Power on the machine using the switch and adjust the speed with the foot pedal. Choose between manual or automatic modes for precise control. To power on, locate the switch, typically on the right or back side, and flip it to the “ON” position. Use the foot pedal to control sewing speed; Always turn off the machine when not in use or during adjustments like threading or changing needles. Unplug the machine for servicing to ensure safety. Refer to your manual for specific instructions to avoid damage or injury. The foot pedal controls the sewing machine’s speed and operation. Gently press the pedal to start sewing, applying more pressure for faster stitching. Release to stop. For manual control, ensure the power switch is in the “OFF” position. Keep the pedal clean and dry to maintain responsiveness. If the pedal feels unresponsive, consult your manual for troubleshooting tips to ensure optimal performance and safety while sewing. Manual operation allows precise control, ideal for inexperienced users, by using the foot pedal with the power switch in the “OFF” position. Automatic operation, however, offers convenience for experienced sewists, enabling hands-free stitching through built-in controls. Choose manual for customization or automatic for efficiency, depending on your project needs. Always consult the manual to ensure proper settings for either mode, guaranteeing safety and optimal performance. Choosing the right fabric and thread is essential for successful sewing. Match fabric weight with thread type, ensuring compatibility for optimal results and durability in your projects. Selecting the appropriate fabric ensures optimal sewing results. Consider fabric weight, texture, and drape for your project. Cotton and polyester blends are ideal for beginners, while delicate fabrics like silk require precise handling. Always prewash fabric to remove sizing and shrinkage. Match thread type to fabric weight for seamless stitching. Test fabric samples to ensure compatibility with your machine settings for professional-grade outcomes. Choosing the right thread ensures durability and professional-grade stitching. For general sewing, cotton or polyester threads are ideal due to their strength and versatility. Specialized threads, like silk or metallic, are perfect for decorative stitching. Always match thread weight to fabric thickness for balanced results. Use high-quality threads to avoid breakage and ensure smooth machine operation. Proper thread selection enhances both the appearance and longevity of your sewing projects. Your sewing machine offers a variety of built-in stitch patterns, from basic straight stitches to decorative zigzag and embroidery options. Choose the perfect stitch for your fabric type and project needs, ensuring professional results every time. Customization options allow you to adjust stitch length and width, making your sewing experience versatile and efficient. Your sewing machine features a range of built-in stitch patterns designed to cater to various sewing needs. These include straight stitches for basic sewing, zigzag stitches for elastic fabrics, and decorative patterns for embroidery. Each stitch serves a specific purpose, ensuring versatility in your projects. By understanding the options, you can select the ideal stitch for your fabric type, enhancing both functionality and creativity in your work. Adjusting the stitch length and width on your sewing machine allows for precise control over your sewing projects. Use the control dial or button to modify these settings, ensuring they match your fabric type and desired outcome. Shorter stitches are ideal for heavy fabrics, while longer stitches suit lightweight materials. Similarly, narrower widths are best for delicate patterns, while wider widths add decorative flair to your work. Regular maintenance ensures optimal performance of your sewing machine. Clean the machine, oil moving parts, and replace worn components. Troubleshoot common issues like thread jams or uneven stitches promptly to prevent damage. Regular maintenance is essential to keep your sewing machine running smoothly. Always turn off the machine when cleaning or oiling. Use a soft brush to remove lint and debris from the bobbin area and tension discs. Oil the moving parts as recommended to prevent rust and ensure smooth operation. Check and replace the needle regularly to avoid damage to the machine or fabric. For optimal performance, follow the maintenance schedule outlined in your manual. This will help extend the life of your sewing machine and maintain consistent stitching quality. By staying proactive, you can prevent common issues and enjoy uninterrupted sewing sessions. If your sewing machine experiences issues like thread bunching or uneven stitching, check the tension settings and ensure proper threading. If the machine does not power on, verify the power cord connection and foot pedal functionality. For fabric feeding problems, ensure the presser foot is lowered and the walking foot is correctly attached. Regularly clean lint from the bobbin area to prevent jams. Refer to your manual for specific solutions to maintain smooth operation and resolve common problems effectively. Explore various accessories like specialized presser feet, extension tables, and additional bobbins, enhancing your sewing machine’s versatility for different fabric types and stitching techniques efficiently. Maximize your sewing experience with optional accessories such as specialized presser feet, extension tables, and additional bobbins. These tools enhance versatility, allowing you to tackle various fabrics and stitching techniques with ease. Whether it’s quilting, embroidery, or heavy-duty sewing, the right accessories can streamline your workflow and elevate your projects to professional quality. Always refer to the manual for compatibility and installation guidance. Specialized attachments like zipper feet or buttonhole makers can be installed to expand your sewing machine’s capabilities. Always align the attachment with the machine’s shank and secure it firmly. Follow the manual’s instructions for specific attachment types. Test the attachment on scrap fabric before use. Regularly clean and maintain attachments to ensure optimal performance. Explore optional accessories to enhance your sewing experience and tackle diverse projects with precision and ease. Start with simple projects, practice on scrap fabric, and always refer to the manual. Master basic stitches before exploring advanced features. Sewing takes patience—don’t rush your first creations! Begin by choosing a simple project, like a straight-seam fabric bag or a basic hem. Gather your fabric, thread, and sewing tools. Always read the manual for specific settings. Start with a straight stitch, ensuring proper fabric alignment. Practice on scrap fabric before sewing your final piece. Patience is key—take it one step at a time and enjoy the creative process! Avoid common errors by ensuring proper fabric alignment and maintaining consistent tension. Neglecting to backstitch or improperly threading the machine can lead to loose seams. Always use the correct needle type for your fabric to prevent breakage. Skipping manual guidelines can result in misaligned stitches. Practice on scrap fabric before working on your final project to refine your technique. Unlock your creativity with programmable stitches, memory settings, and customizable options. Explore advanced stitching patterns and specialized functions like automatic thread cutters for precision and efficiency in every project. Your new home sewing machine offers a variety of advanced stitching options, including decorative, quilting, and heirloom stitches. Programmable stitches allow customization, while memory settings save your favorites. Use the control panel to navigate through patterns, and explore features like automatic thread cutters for seamless project completion. Experiment with stitch length, width, and density to achieve professional results. These features empower you to tackle complex designs with precision and creativity. Your new home sewing machine allows you to tailor your sewing experience to your needs. Programmable stitches, adjustable stitch length, and width settings let you personalize every project. Memory functions save your favorite settings, while customizable speed controls enable precise stitching. Explore advanced features like automatic thread tension and one-touch buttons for effortless adjustments. These tools empower you to bring your creative ideas to life with precision and ease. Your new home sewing machine is backed by a comprehensive warranty, covering parts and labor for defects. For assistance, contact customer support via phone, email, or online chat. Your new home sewing machine is protected by a comprehensive warranty covering manufacturing defects in materials and workmanship. The warranty typically lasts for a specified period from the purchase date. It includes coverage for parts and labor but excludes damage caused by misuse or normal wear and tear. To activate your warranty, ensure you register your machine as instructed. For detailed terms and conditions, refer to the warranty section in your manual or contact customer support. For assistance, visit the official website to find contact details or submit a support ticket. You can also reach customer support via phone or email, as listed in your manual. Be prepared to provide your machine’s model number and purchase date for efficient service. Additionally, online forums and community resources are available for troubleshooting and tips from experienced users.Unpacking Your Sewing Machine
Checking the Contents of the Package
Safety Precautions
General Safety Guidelines
Keep loose clothing and long hair tied back while sewing to avoid accidents.
Ensure the work area is well-lit and free from clutter.
Never leave the machine unattended while it is in operation.
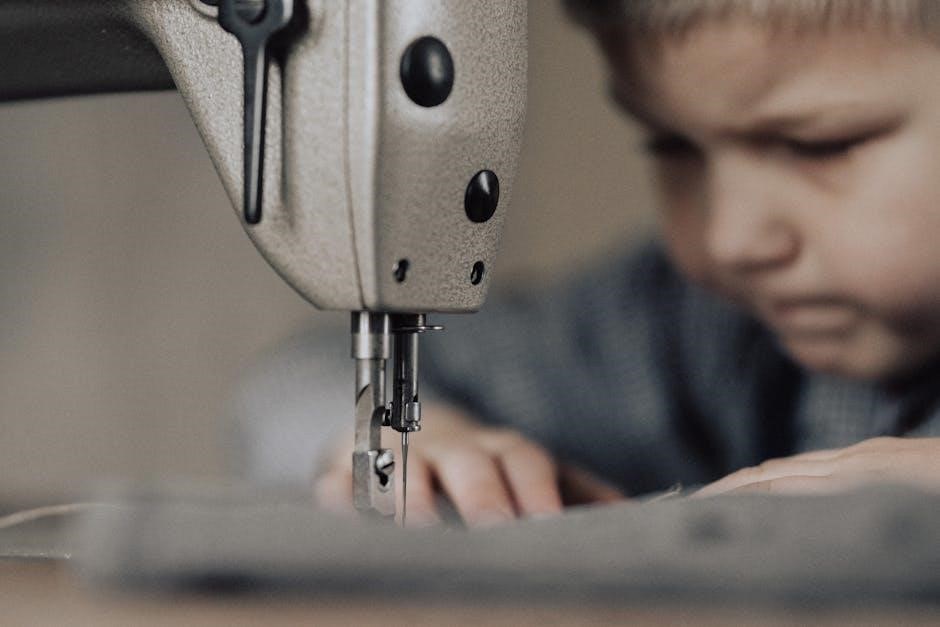
Keep children and pets away from the sewing machine at all times.
Avoid using damaged cords or plugs, as they can cause electrical hazards.
Follow all instructions carefully to ensure safe and proper operation.Electrical Safety Tips
Avoid using damaged power cords or plugs, as they can cause electrical hazards.
Keep the machine away from water or moisture to prevent shocks.
Never operate the sewing machine near water sources or in humid environments.
Ensure the machine is placed on a stable, dry surface to avoid electrical risks.
If you notice any electrical issues, stop using the machine and contact a professional.
Always follow the manufacturer’s guidelines for proper electrical connections.
Regularly inspect the power cord for signs of wear or damage;
Do not overload electrical outlets with multiple high-power devices.
Keep children away from electrical components to prevent accidental shocks.Safety in the Needle Area
Use the needle guard to protect your fingers during operation.
Keep children away while working with sharp components.
Never touch the needle while the machine is powered on.
Wear protective gloves if handling needles frequently.
Regularly inspect needles for damage and replace them as needed.
Ensure the work area is well-lit to avoid accidents.
Avoid sewing when fatigued to maintain focus and prevent injuries.
Never leave loose clothing or long hair near the needle area.
Keep a first-aid kit nearby in case of minor accidents.
Machine Overview
Key Features of Your New Home Sewing Machine
Understanding the Machine Components
Threading the Machine
Upper Threading Process
Bobbin Winding and Installation
Lower Threading Techniques
Basic Operation
Powering On and Off
Using the Foot Pedal
Manual vs. Automatic Operation
Fabric and Thread Selection
Choosing the Right Fabric for Your Project
Selecting the Appropriate Thread Type
Stitch Selection
Understanding Built-in Stitch Patterns
Adjusting Stitch Length and Width
Maintenance and Troubleshooting
Routine Maintenance Tips
Troubleshooting Common Issues
Accessories and Attachments
Using Additional Accessories
Installing and Using Specialized Attachments
Tips for Beginners
Getting Started with Your First Project
Common Mistakes to Avoid
Advanced Features
Exploring Advanced Stitching Options
Customizing Your Sewing Experience
Warranty and Customer Support
Understanding Your Warranty Coverage
Contacting Customer Support